SHED BUILD PLANS · 2026-10-12-reading-v5 · Independent planning reference
Greenhouse + Dry Storage Partition
Collect supplies in the front, carry them through the partition, then work in the growing area. The opening between the zones is the critical part of this storage-and-greenhouse example.
Can the carried tray pass through the partition opening?
Read the two zones and their connection before choosing the partition. The counterexample narrows only the opening while retaining the same carrying requirement.
Garden tools and potting supplies with a distinct growing area.
A partition is useful only when supplies can still pass through its opening.
Reference material, not construction plans. Drawings disclose selected assumptions; they do not establish structural design, permit approval or species capacity.
Locate storage, the partition and the growing bench
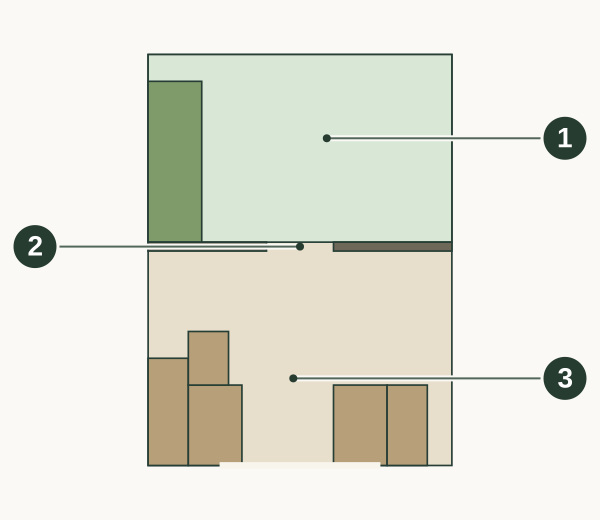
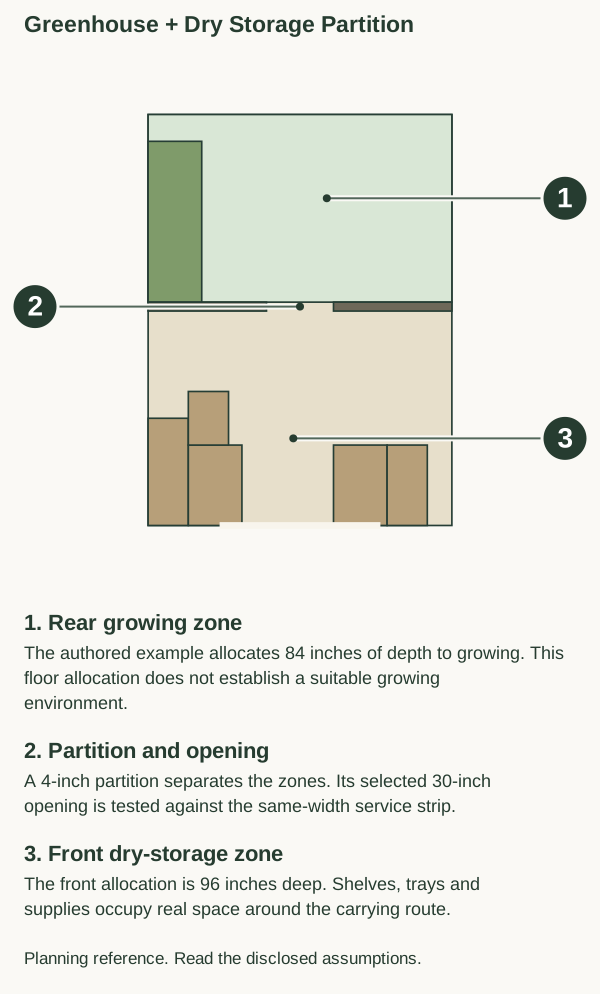
The partition divides the floor but must still connect the tasks.
- 1. Rear growing zone
- The authored example allocates 84 inches of depth to growing. This floor allocation does not establish a suitable growing environment.
- 2. Partition and opening
- A 4-inch partition separates the zones. Its selected 30-inch opening is tested against the same-width service strip.
- 3. Front dry-storage zone
- The front allocation is 96 inches deep. Shelves, trays and supplies occupy real space around the carrying route.
List the items carried between the two zones before fixing the partition position.
Study notes & exact inputs
Original diagram. Authored reference; inches unless marked unknown.
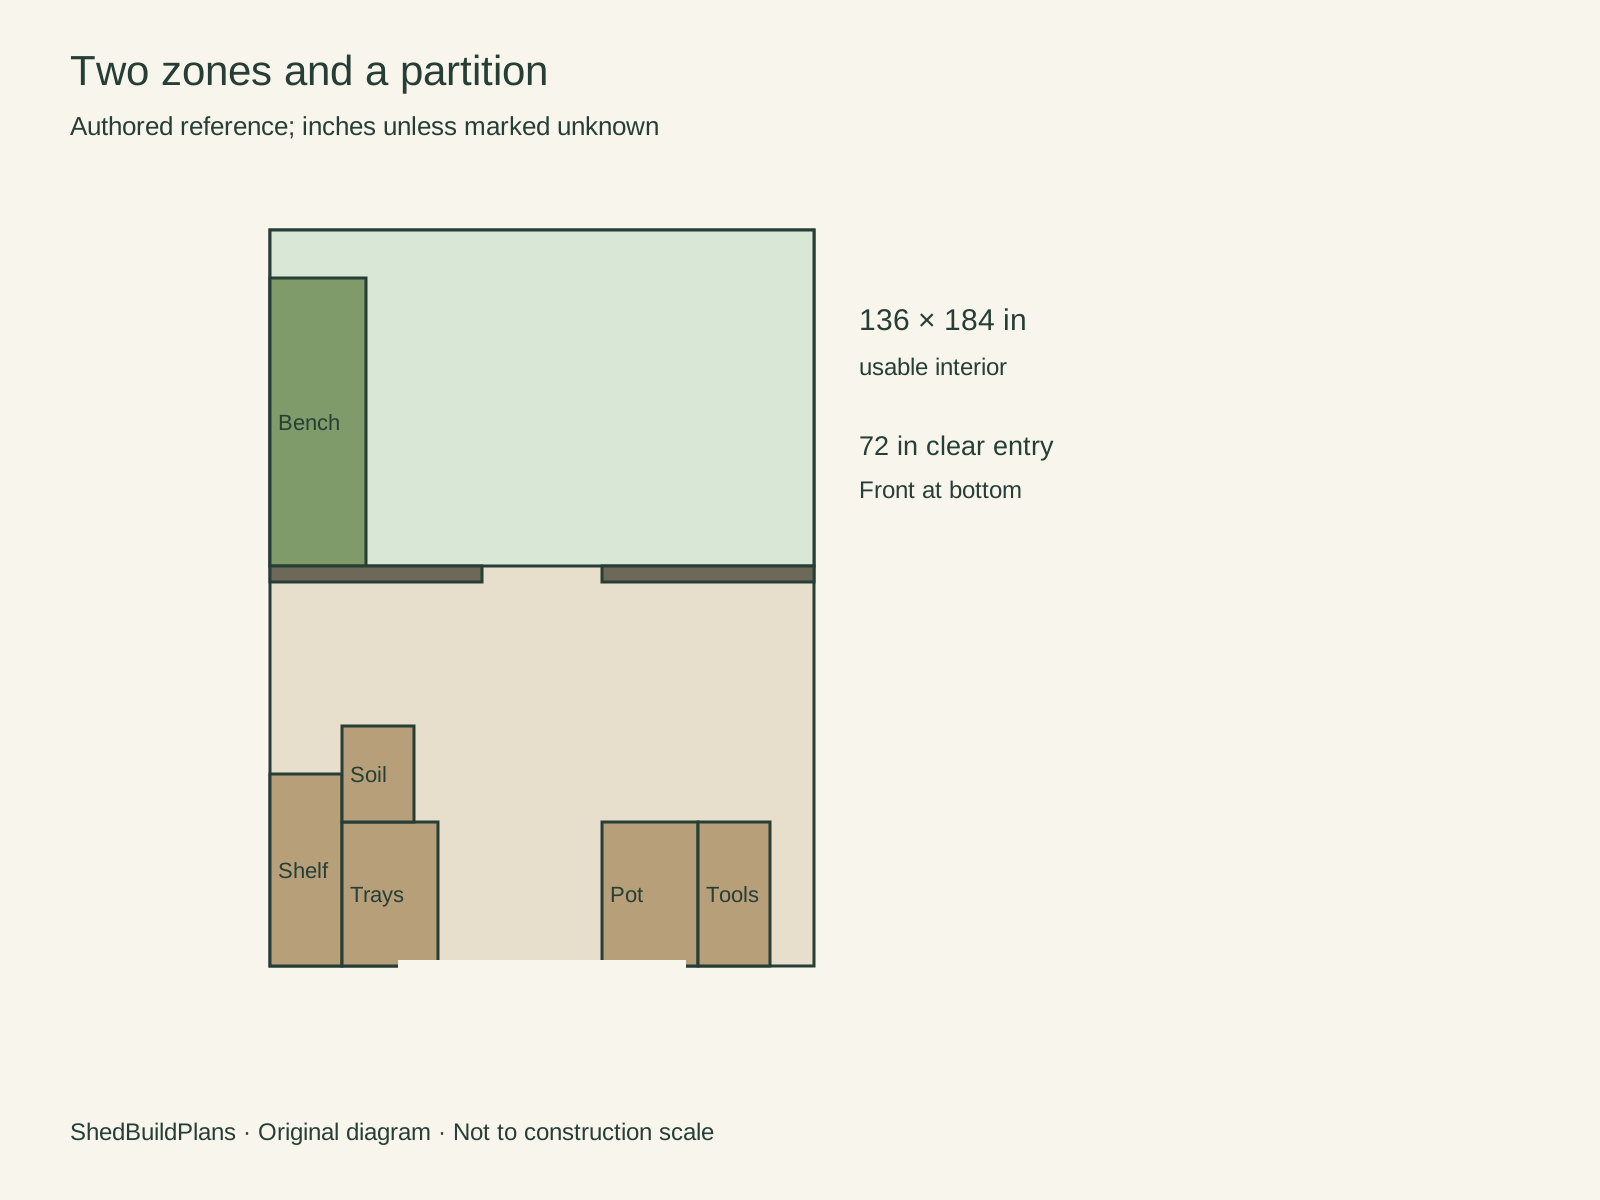
Growing bench: 24×72 in at (0,100). Front shelf: 18×48 at (0,0); trays: 24×36 at (18,0); soil: 18×24 at (18,36). Potting surface: 24×36 at (83,0); tools: 18×36 at (107,0).
The partition occupies y=96–100 in; its 30 in opening runs x=53–83. The clear front entry is 72 in, centered.
Front storage. Shelf, trays, soil, potting surface and tools occupy the front allocation.
Rear growing area. The 84-inch growing zone, 4-inch partition and 96-inch storage zone total 184 inches. The opening connects them.
Follow the central strip into the growing area
Carry supplies between the two zones
Collect at the front
Gather the trays, soil or tools needed for the growing task.
Pass through the partition
Carry the actual load through the connecting opening and toward the growing bench.
Return and reset
Return tools to storage and leave the service strip available for the next trip.
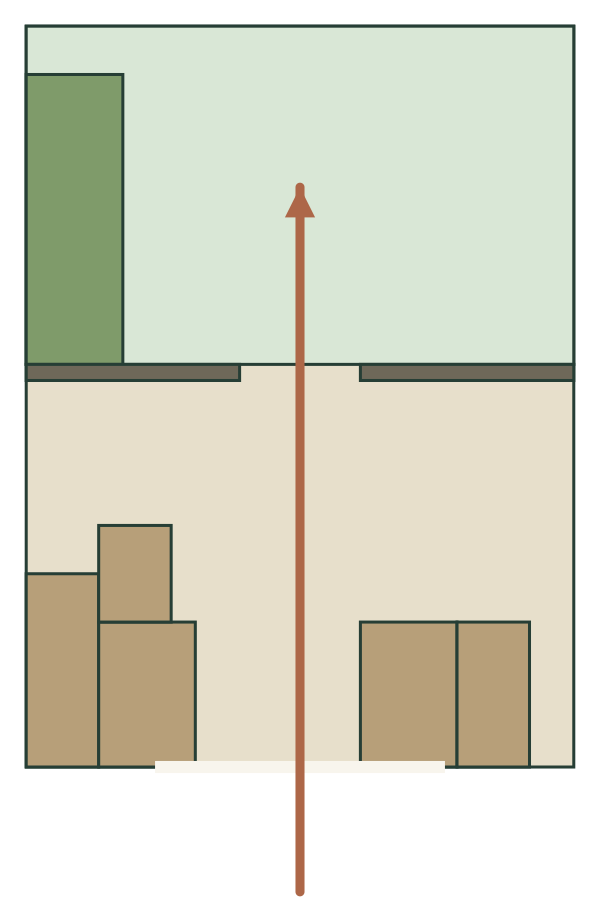
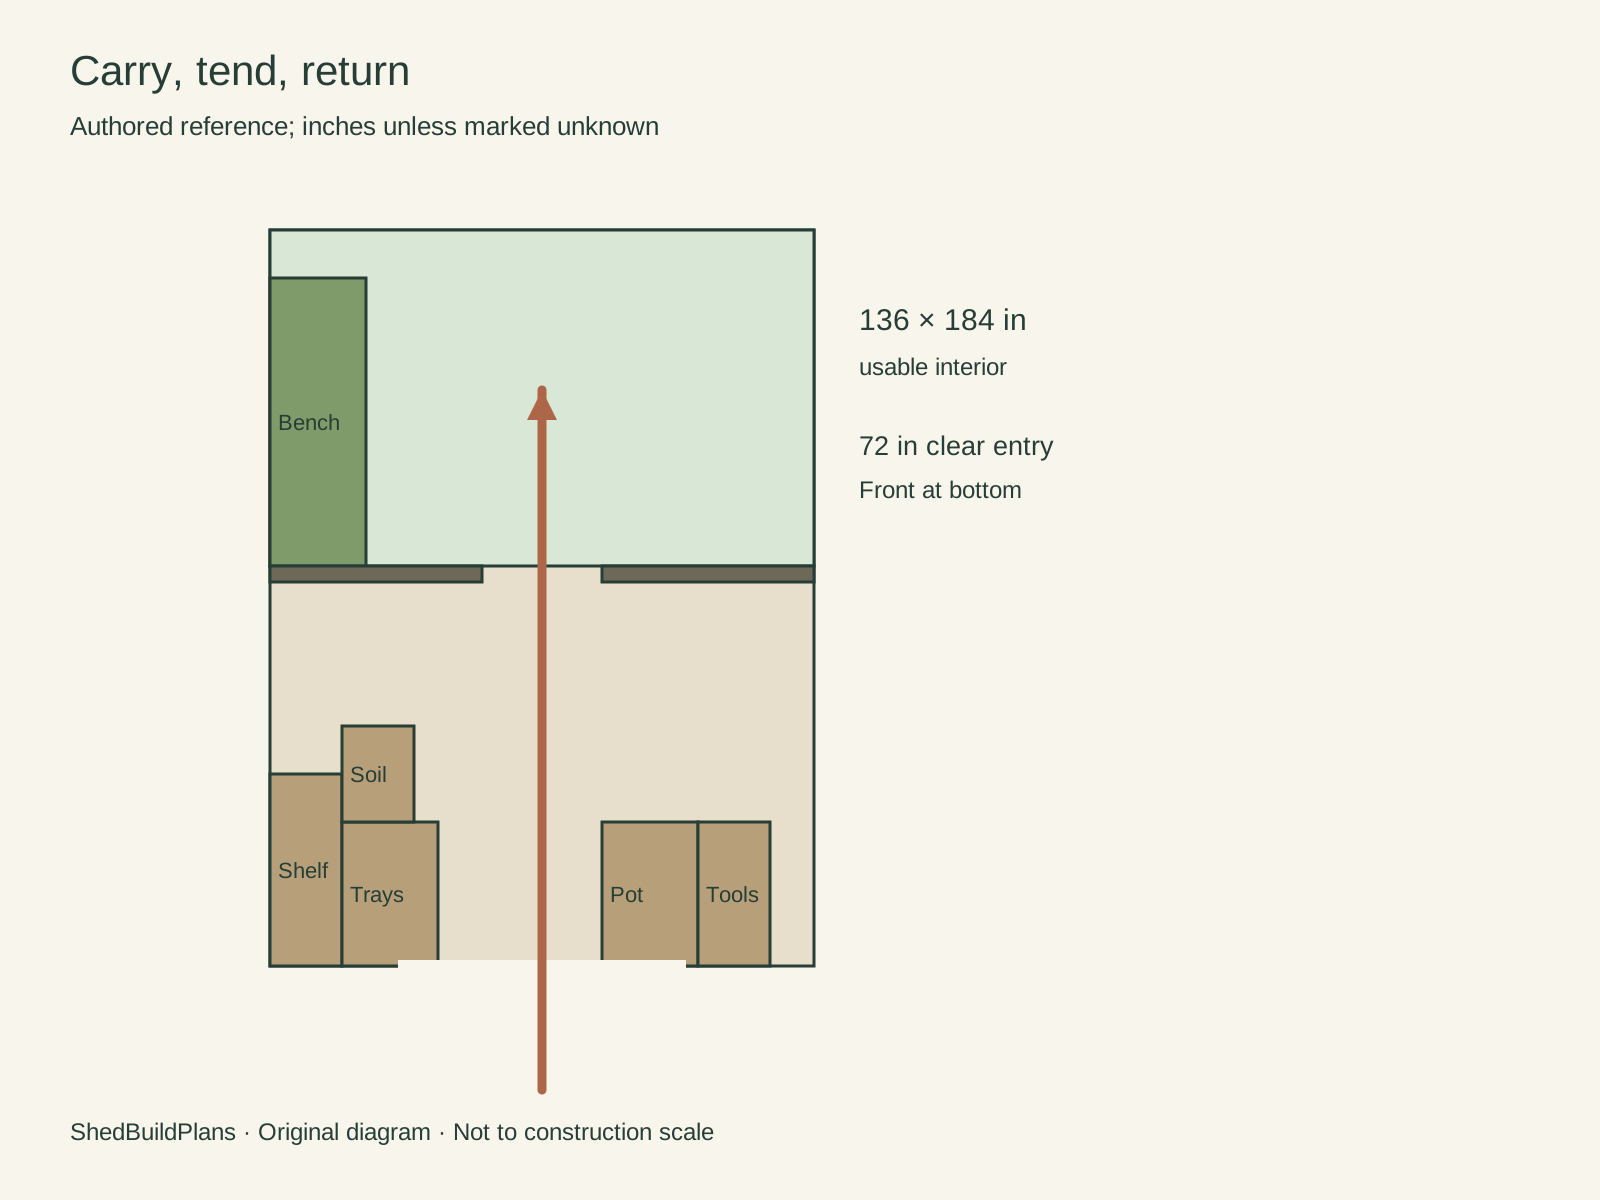
The selected 30-inch strip continues through the partition.
- Start at the entrance
- Follow the central reservation from the front opening into the rear growing area.
- Allow for what you carry
- The clear strip is an authored input; pots, trays, hands and door operation must be checked with real measurements.
Carry the widest intended tray through a mock partition opening and turn toward the growing bench.
Study notes & exact inputs
Original diagram. Authored reference; inches unless marked unknown.
Follow the clear central strip to reach the growing bench, then return tools to the front storage zone. Verify carrying width, reach and the actual door operation.
This diagram records access and allocation. It does not establish that the front zone stays dry or that plants receive adequate light and ventilation.
Keep the zones; change only the partition opening
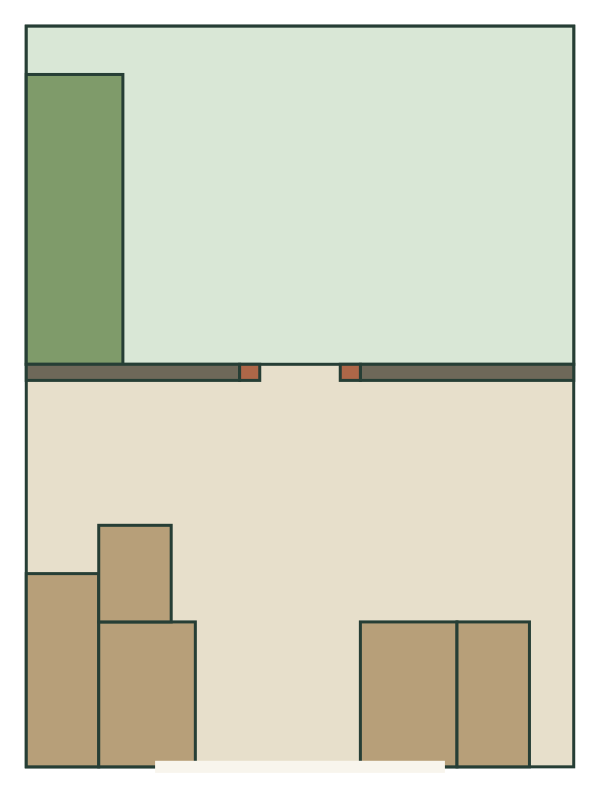
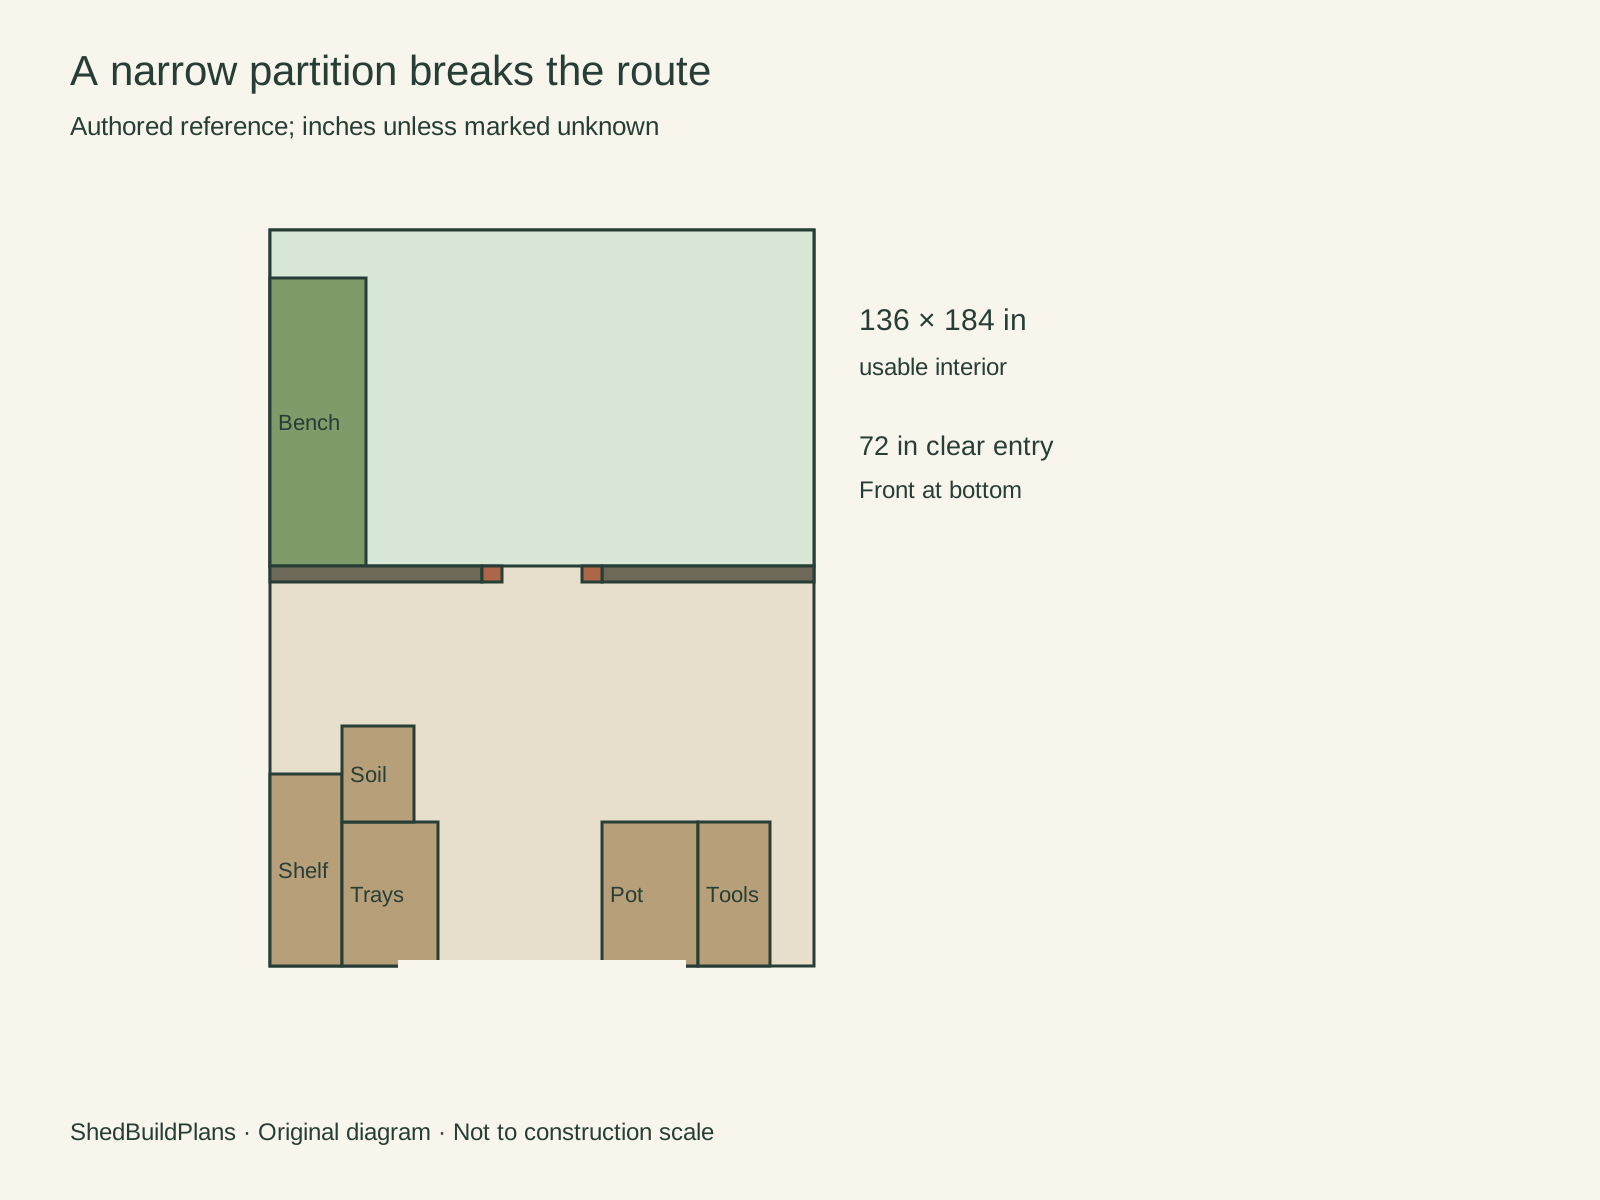
A 20-inch opening is 10 inches narrower than the selected service strip.
- One input changes
- The zones and stored items stay in place. Only the partition opening reduces from 30 to 20 inches.
- The task determines the test
- Shrinking the route reservation to make the diagram pass does not demonstrate workable carrying space.
Set the carrying requirement first, then compare the finished clear opening with it.
Study notes & exact inputs
Original diagram. Authored reference; inches unless marked unknown.
Counterexample: retain every zone and item but reduce the partition opening from 30 to 20 in. The remaining opening fails the selected 30 in route width.
Reducing a route allowance to make a drawing pass does not establish workable carrying clearance. Measure the task first.
Study notes & exact inputs
Locate storage, the partition and the growing bench
Original diagram. Authored reference; inches unless marked unknown.
Growing bench: 24×72 in at (0,100). Front shelf: 18×48 at (0,0); trays: 24×36 at (18,0); soil: 18×24 at (18,36). Potting surface: 24×36 at (83,0); tools: 18×36 at (107,0).
The partition occupies y=96–100 in; its 30 in opening runs x=53–83. The clear front entry is 72 in, centered.
Front storage. Shelf, trays, soil, potting surface and tools occupy the front allocation.
Rear growing area. The 84-inch growing zone, 4-inch partition and 96-inch storage zone total 184 inches. The opening connects them.
Follow the central strip into the growing area
Original diagram. Authored reference; inches unless marked unknown.
Follow the clear central strip to reach the growing bench, then return tools to the front storage zone. Verify carrying width, reach and the actual door operation.
This diagram records access and allocation. It does not establish that the front zone stays dry or that plants receive adequate light and ventilation.
Keep the zones; change only the partition opening
Original diagram. Authored reference; inches unless marked unknown.
Counterexample: retain every zone and item but reduce the partition opening from 30 to 20 in. The remaining opening fails the selected 30 in route width.
Reducing a route allowance to make a drawing pass does not establish workable carrying clearance. Measure the task first.
Set the carrying task before fixing the partition
Use the drawings as a starting point. Record the result of each check before carrying this arrangement into your own plan.
1. Compare opening with carried width
The counterexample changes only the partition opening: 30 in becomes 20 in while the service reservation stays 30 in. See the drawing
- Measure or try
- Measure the loaded tray including hands and projections, then record the finished clear opening.
- Change the arrangement if…
- If the required carried width exceeds the opening, enlarge or relocate the connection; shrinking the drawn strip does not solve the task.
2. Try the turn after the opening
The selected central strip connects the front entrance to the rear zone, without a simulated loaded turn. See the drawing
- Measure or try
- Carry the intended load through a mock opening and turn toward the actual growing surface.
- Change the arrangement if…
- If the turn hits a shelf, surface or door, change their positions and repeat the complete trip.
3. Budget both zones together
96 in front + 4 in partition + 84 in rear = 184 in total depth in this example. See the drawing
- Measure or try
- Record usable depth and the proposed partition thickness before allocating storage and growing surfaces.
- Change the arrangement if…
- If either zone grows, recalculate the other from the same total depth and retest the connection.
Size the task before narrowing the opening
- Carried load
- Measure the tray or container in the actual carrying position, including hands.
- Door operation
- Check the finished clear opening and where an operating door occupies space.
- Conditions in both zones
- Review watering, drainage and ventilation together; a divider does not prove dry storage.
Preparation notes
Size the task before narrowing the opening
- Carried load
- Measure the tray or container in the actual carrying position, including hands.
- Door operation
- Check the finished clear opening and where an operating door occupies space.
- Conditions in both zones
- Review watering, drainage and ventilation together; a divider does not prove dry storage.
Where this reference fits
- Garden tools and potting supplies with a distinct growing area.
- Checking service access before choosing how much length each zone gets.
Trade-offs
- A partition consumes space and does not by itself control moisture.
- More growing length leaves less dry-storage length.
Still to assess
- Measure actual enclosure, opening and occupied bench dimensions.
- Review sunlight, ventilation, condensation, drainage and irrigation locally.
- Confirm materials and separation details; fuels and chemicals are outside this study.
Appearance & material choices
The interior concept looks from opaque front storage into the glazed growing area. The connecting opening is a practical part of the reference, not simply a decorative view.
- Check the things carried through
- Measure trays, compost containers and the actual carrying task through the partition opening. The diagram gives the authored geometry; the image's apparent width cannot establish usable clearance.
- Keep environment questions visible
- The partition separates floor allocations but does not establish a dry front room. Growing, watering, drainage and ventilation must be considered together. Surface materials and the illustrated floor transition are not construction details.
Declared facts & assumptions
Nominal exterior class only. All clear dimensions below are authored example inputs, not a product specification.
- Usable width: 136 in
- planning assumption · Authored interior. [editorial]
- Usable depth: 184 in
- planning assumption · Authored interior. [editorial]
- Growing depth: 84 in
- planning assumption · Rear zone; not a yield recommendation. [editorial]
- Dry-storage depth: 96 in
- calculated · 184 − 84 − 4 in partition. [editorial]
- Partition opening: 30 in
- planning assumption · Equal to the authored tending aisle; verify handling clearance. [editorial]
Sources & current resource status
Original assumptions and diagram manifest
ShedBuildPlans · US reference; confirm local conditions · Checked 2026-09-14
Defines this study’s authored geometry and questions; not built-project evidence.
Hobby Greenhouses
UGA Cooperative Extension · US reference; confirm local conditions · Checked 2026-09-14
Supports evaluating ventilation and greenhouse environmental control; does not validate this partition or its dimensions.
https://fieldreport.caes.uga.edu/publications/B910/hobby-greenhouses/
Garden Sheds
UGA Cooperative Extension · US reference; confirm local conditions · Checked 2026-09-14
Supports accessible, dry garden-tool storage; no claim of climate separation for this example.
https://fieldreport.caes.uga.edu/publications/C1027-7/garden-sheds/
Hobby Greenhouses
UGA Cooperative Extension · free · available · Checked 2026-09-14
Public original source. Opens with its provider; no third-party material is hosted here.
Open provider resourceGarden Sheds
UGA Cooperative Extension · free · available · Checked 2026-09-14
Public original source. Opens with its provider; no third-party material is hosted here.
Open provider resourceOriginal PDFs remain available on the project page as historical study editions. The current guide and chapter figures are included here.
Project page and current resources